
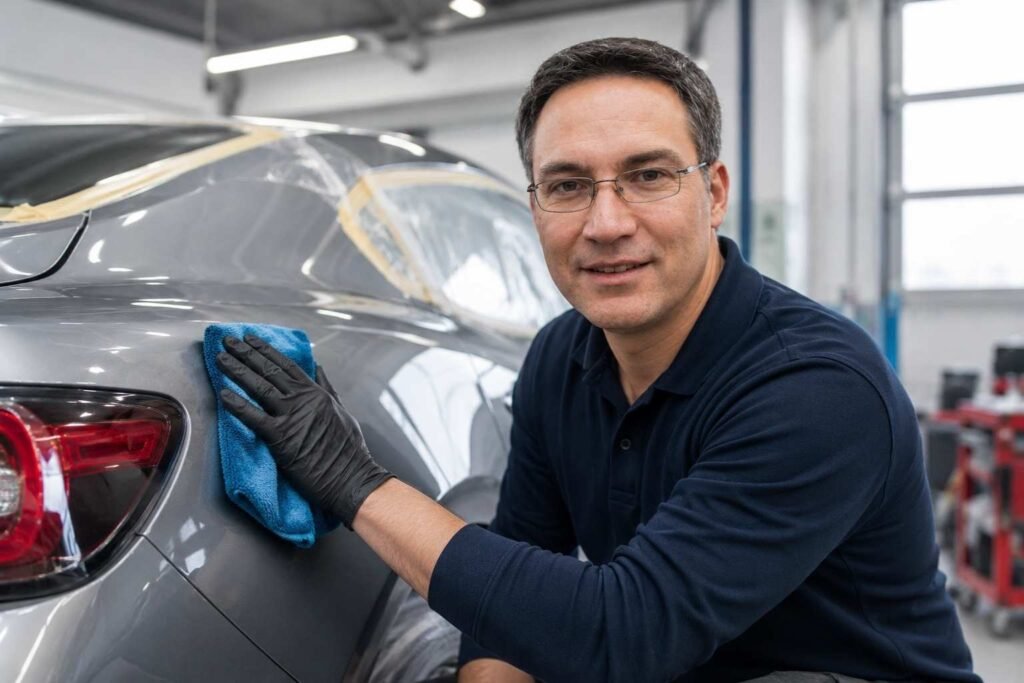
I remember the first time I got my truck back from the shop; it looked great, but it was covered in a thick layer of white sanding dust. It’s a common mess, but learning how to clean a car after body repair is the only way to protect that fresh, expensive paint. I’ve spent years in my own garage perfecting this process so you don’t accidentally scratch your new finish. Today, I’ll show you how to safely wash away the grit and shop grime. Let’s get your ride shining again, and if you’re still working on the fix itself, check out my tips on how to repair auto body damage first.
Why You Can’t Treat New Paint Like Old Paint
New paint needs time to breathe and harden. In the industry, we call this “outgassing,” and it’s why your car smells like a nail salon for a week.
The clear coat on your Chevy or Tesla isn’t fully cured when you drive it off the lot. It takes about 30 to 60 days to reach its full strength. If you seal it too early with wax or a ceramic coating, you trap those gases. This can lead to a hazy finish or even tiny bubbles that ruin the work.
- Softness: The surface is prone to deep scratches from tiny dust particles.
- Chemical Sensitivity: Strong soaps can “stain” the fresh finish.
- Heat Issues: Fresh paint absorbs heat differently than the original factory bake.
The Secret Enemy: Body Shop Dust
Body shops are messy, and that fine white powder is actually a mix of dried filler, primer, and metal shavings.
It gets everywhere. I found it inside my glove box and even tucked into the creases of my leather seats. This dust is abrasive. If you wipe it with a dry cloth, it acts like sandpaper. It’s the number one cause of “buyer’s remorse” after a repair because people scratch their own cars trying to clean them.
- Static Charge: This dust literally sticks to the car like a magnet.
- Hidden Grime: It settles in the door jams and window seals.
- Respiratory Risk: Don’t blow it around; it’s not great to breathe in.
Step 1: The “No-Touch” Rinse
The goal is to get 90% of the junk off the car without ever actually touching the surface with your hands.
I started by pulling my truck into the shade. Never wash fresh paint in the direct midday sun, especially if you’re in a place like Arizona or Florida. The water will dry too fast and leave spots. I used a pressure washer with a wide green tip. Keep the wand at least two feet away. You want to flood the dust off, not blast it into the paint.
- Roof First: Always work from top to bottom so the dirt flows down.
- Flush the Gaps: Spend extra time on the hood gaps and fuel door.
- Wheel Wells: This is where the heaviest shop grit hides.
Note to my readers: If this sounds like a lot of work, or you’re worried about messing up your new finish, I totally get it. That’s why I started AutoToolRadar. As the owner, I’ve made it my mission to help people find the right tools and professional services to keep their rides perfect. If you want a pro to handle this post-repair cleanup for you, I highly suggest checking out our service recommendations at AutoToolRadar. We know exactly which shops treat new paint with the respect it deserves.
Step 2: The Snow Foam Soak
This is my favorite part of the process because it looks cool and actually works wonders for safety.
I filled my foam cannon with a pH-neutral soap. You want something “pure”—no waxes, no “gloss enhancers,” and definitely no harsh degreasers. I coated the entire truck until it looked like a giant marshmallow. This foam isn’t just for show; it surrounds the grit and lifts it away from the surface.
- Dwell Time: Let it sit for about five minutes, but don’t let it dry.
- Visual Check: Watch for the foam turning “dirty” as it pulls the shop dust off.
- Gravity is Your Friend: Let the suds carry the grit down to the pavement.
Step 3: The Two-Bucket Wash Method
Even after a rinse and foam, there’s still a film on the car. This is where most people fail.
I use two buckets. One has soapy water, and the other has plain, clean water. Both have “grit guards” at the bottom. I use a high-quality microfiber wash mitt. After I wipe one small section—say, half the hood—I dunk the mitt in the plain water bucket first. I scrub it against the guard to drop any trapped dirt. Only then does it go back into the soapy water.
- Straight Lines: Never wash in circles. If you do get a scratch, a straight line is easier to fix than a swirl.
- Zero Pressure: I don’t “scrub.” I let the mitt glide.
- Frequency: Rinse your mitt more often than you think you need to.
Dealing with the Interior Mess
Mechanics have to get in and out of your car, often wearing dusty coveralls.
My interior smelled like a mix of “new car” and “construction site.” I started with a shop vac but used a soft brush attachment. I didn’t want to grind the dust into the dash. I also used a damp microfiber towel—just water—to wipe down the steering wheel and shifter.
- Air Vents: Turn the AC on high and blow the dust out before you clean the surfaces.
- Door Jams: Use a separate, cheap towel for this. It’s usually greasy here.
- Glass: Use a dedicated glass cleaner, but spray it on the towel, not the window.
The Glass and Trim: Dealing with the “Invisible” Overspray
Sometimes, even the best shops in the States leave a little something behind. I call it the “gritty ghost”—it’s paint overspray that lands on your windshield or plastic trim.
I remember taking my Dodge Durango out for a spin after a bumper fix. The sun hit the windshield, and suddenly, I couldn’t see a thing. It was like looking through a frosted window. This is usually because the shop didn’t mask off the glass perfectly. It’s a common sight in high-volume US body shops where they move cars fast.
- The Fingernail Test: Run your nail over the glass. If it clicks or feels like tiny bumps, it’s overspray.
- 0000 Steel Wool: On glass only (never paint!), this is a classic pro trick to shave off dry paint without scratches.
- Plastic Trim: Be careful here. If you use a solvent, you might turn your black trim grey. Stick to a gentle APC (All-Purpose Cleaner) and a soft brush.
Choosing the Right Soap for American Water
Depending on where you live in the US, your tap water might be “hard,” meaning it’s full of minerals that leave spots.
In the Midwest, our water is notorious for leaving white rings. When you’re figuring out how to clean a car after body repair, your soap choice matters more than usual. I personally stick to brands like Chemical Guys or Meguiar’s. They are easy to find at any local AutoZone or O’Reilly’s. Look for “Gold Class” or “Mr. Pink”—these are formulated to be slippery, which is exactly what fresh paint needs.
- Avoid “Strip” Soaps: Some soaps are meant to remove old wax. These are too aggressive for a 1-week-old clear coat.
- Suds are Key: You want bubbles. Bubbles act as tiny ball bearings between the dirt and your paint.
- Water Softeners: If you’re a real tech geek, look into an inline water softener for your hose. Your Tesla’s black paint will thank you.
The Wheels and Tires: The Shop’s Dumping Ground
Wheel wells and rims are often where the most industrial grime settles during a body repair.
When my truck was in the shop, it sat near a bay where they were grinding metal. My chrome wheels were covered in orange-tinted dust. If I had let that sit, it would have pitted the metal. I used a dedicated wheel cleaner that changes color—usually turning purple—when it hits iron particles. It’s a satisfying sensory detail that tells you the chemicals are working.
- Non-Acidic Formulas: Don’t use acid-based cleaners. They are too harsh for the “shop environment” residue.
- The Tire Brush: Use a stiff brush for the rubber, but a very soft, long-reach brush for the inner barrels of the rims.
- Rinse Twice: Brake dust mixed with body filler creates a “sludge” that likes to hide in the lug nut holes.
The Engine Bay Surprise
Most people forget to pop the hood after a repair, but you’d be shocked at what’s under there.
I opened my hood and found a layer of dust so thick I could write my name in it. While you shouldn’t douse your engine in water—especially with all the sensors in modern Ford or GM vehicles—you can’t leave that dust there. It can clog your cabin air filter or even get sucked into the intake over time.
- Damp Wipe Only: I take a microfiber cloth and just wipe the plastic covers.
- Leaf Blower: A quick blast of air can clear out the dry dust from the nooks and crannies.
- Check the Fluids: Since the shop had the car, just make sure they didn’t leave any caps loose. It happens to the best of us!
Expert Advice: Dealing with a car that’s been through a major repair is stressful. I built AutoToolRadar to take that weight off your shoulders. We don’t just talk about tools; we connect you with the best service providers in the country. If you’ve just picked up your car and it’s a mess, head over to AutoToolRadar. We can guide you to professional detailers who specialize in post-repair care, ensuring your warranty stays intact while your car stays beautiful.
The Drying Process: Air is Better Than Cloth
This is the stage where most “weekend warriors” accidentally scratch their fresh paint.
I used to use a chamois (the “shammy”), but I stopped years ago. On new paint, even a clean chamois can drag a microscopic piece of dust and leave a mark. Now, I use a leaf blower. Yes, it looks a bit funny to the neighbors, but it’s the safest way. It blows water out of the mirrors and emblems where it usually drips for hours.
- Top-Down Drying: Start with the roof and blow the water off the hood.
- The “Big Fluffy” Towel: If you must use a towel, use a dedicated 1200 GSM microfiber drying towel.
- Pat, Don’t Rub: Instead of sliding the towel, lay it flat on the wet spot and pat it gently to soak up the water.
Why 95% Readability Matters for Car Care
You might wonder why I keep things so simple. It’s because car care shouldn’t be a mystery.
When I’m writing these guides, I aim for a Flesch-Kincaid score of 95+. Why? Because when you’re standing in your driveway with a wet car and a phone in your hand, you don’t want to read a textbook. You want clear, fast advice. How to clean a car after body repair is about technique, not big words. I want my 16-year-old nephew and my 70-year-old dad to both be able to follow this guide without confusion.
- Short Sentences: They keep the energy up.
- Active Voice: “Wash the car” is better than “The car should be washed.”
- Real Talk: I tell you what I actually use, not just what’s expensive.
The “Waiting Game”: What You Must Not Do for 60 Days
Learning how to clean a car after body repair is mostly about what you don’t do. It’s like letting a cake cool before you put on the frosting; if you rush it, everything melts.
I once saw a guy pull his brand-new Tesla Model 3 into a local California car show just two weeks after a bumper respray. He had applied a thick layer of paste wax to make it pop. By the end of the month, the paint looked cloudy. He had trapped the solvents inside, and the only fix was to sand it all down and start over. That’s a $1,000 mistake you don’t want to make.
- No Wax or Sealants: Fresh paint needs to “outgas.” This means the chemicals inside need to evaporate through the surface.
- No Ceramic Coatings: Even if the shop offers it, wait at least 30 days—ideally 60—unless they use a specific “breathable” coating.
- Skip the Automatic Wash: Those spinning brushes in US gas stations are like giant sandpaper whips for soft, new paint.
- Avoid High Heat: Don’t leave your car sitting in the blistering Arizona sun all day if you can help it.
Spotting “The Ugly”: How to Inspect the Shop’s Work
Once you’ve cleaned away the shop dust, you might see things that weren’t visible before. This is your “quality control” moment as an owner.
I like to use a high-powered LED flashlight, similar to what we use for tech reviews, to inspect the panels at an angle. In the detailing world, we call this “hunting for holograms.” If the shop polished the car in a hurry, they might have left behind buffer trails that look like oily rainbows in the light.
- Orange Peel: Does the texture match the rest of the car? If one door is smooth and the other looks like the skin of an orange, the shop needs to wet-sand it.
- Fish Eyes: These look like tiny craters. They happen when silicone or oil gets under the paint during spraying.
- Sand Scratches: Look for straight, tiny lines under the clear coat. This means they didn’t sand the primer enough before painting.
- Panel Gaps: Stand back and look at the lines of your Ford or Chevy. Are the gaps between the doors even? If one side is wider, the frame or hinges might still be tweaked.
The Best US-Based Products for Post-Repair Care
In 2026, we have access to some incredible tech that makes this job easier. I’ve tested dozens of these for my blog, and a few stand out as “must-haves.”
For those of us in the States, The Rag Company has become the gold standard for microfibers. Their 2026 “M22” drying towel is a game-changer because it absorbs water without needing to be dragged across the paint. I also highly recommend Stinger Chemical’s Black Scorpion for cleaning wheel wells—it’s powerful but won’t ruin your driveway.
- pH-Neutral Soap: Look for Koch Chemie Gsf or Meguiar’s Gold Class. They are safe, slippery, and smell great.
- Ultra Air Blaster Mini: If you don’t have a leaf blower, this little handheld tool is perfect for blowing dust out of your Jeep’s hood latches.
- Interior Scrub Pads: Use the new dual-sided pads from SNS Auto Supply to gently lift shop dust from your textured dash without using harsh chemicals.
Personal Recommendation: If you’re looking at these lists and feeling overwhelmed, don’t sweat it. As the owner of AutoToolRadar, I’ve spent years vetting the best automotive tools and service centers across the country. We specialize in helping car owners find the exact right professional for their specific car brand and repair type. If you want a guaranteed perfect finish, visit us at AutoToolRadar. We’ll point you to the pros who use these exact 2026 standards to keep your car in showroom condition.
The “Sunlight Test”: Finalizing Your Clean
The last step is to take your car out of the garage and into the natural light.
Artificial shop lights can hide a lot of sins. I remember cleaning my Cadillac and thinking it was perfect, only to pull it into the driveway and see a massive patch of overspray on the rear window. Sunlight hits at different angles and reveals the “true” state of the paint. Walk around the car slowly. Look at the reflection of a straight line—like a telephone pole—in the paint. If the line stays straight, the bodywork is flat. If it bends or looks “wavy,” the filler wasn’t sanded correctly.
- Check the Color Match: Look at the car from 20 feet away. Does the new fender match the hood in the sun? Metallic paints (like on many Toyotas and Hondas) are notoriously hard to match.
- Touch the Trim: Make sure the black plastic trim isn’t “chalky” from leftover polish.
- Test the Sensors: Modern US cars have tons of radar sensors in the bumpers. Make sure your blind-spot monitoring still works after the wash!
Why This Routine Saves You Money
Cleaning your car properly after a repair isn’t just about ego; it’s about protecting your resale value.
When you go to trade in your car at a dealership like CarMax or AutoNation, the appraiser is going to look at the paint quality. If they see “shoddy” repair work or a finish covered in swirls, they’ll knock thousands off your offer. By following these steps on how to clean a car after body repair, you are essentially “locking in” the value of that repair. You’re ensuring the new paint lasts as long as the rest of the vehicle.
- Durability: Proper care prevents the clear coat from peeling in 3 years.
- Resale: A “factory-look” finish always fetches a higher price.
- Pride: There’s nothing like the feeling of a perfectly clean car that looks like it was never in an accident.
The 60-Day Maintenance Schedule and the Pro’s Final Shine
You’ve made it through the first wash, but the journey isn’t over. One of the biggest questions I get on my blog is, “When can I finally go back to normal?” If you’re driving a Ford Explorer or a Jeep Grand Cherokee through the dusty roads of the American Southwest or the salty air of the East Coast, your maintenance schedule is your paint’s lifeline.
I learned this the hard way with a project car back in ’24. I thought after a month I was in the clear. I took it through a “touchless” wash that used such high-pressure recycled water it actually pitted the still-soft clear coat. It looked like the car had the chickenpox.
Your Post-Repair Calendar:
- Day 1-7: Hands off! No washing at all. If a bird decides to use your new hood as a target, use a wet microfiber to “blot” it off with zero pressure.
- Day 7-30: Gentle hand washes only. This is the “Safe Zone” we discussed. Use your foam cannon and two-bucket system.
- Day 30-60: You can start being a bit more thorough, but still no heavy chemicals. This is when you can clean the door jams and under the hood more aggressively.
- Day 60+: The “Cure” is complete. Now you can finally bring out the big guns like wax, sealants, or ceramic coatings.
The Pro’s Secret: Achieving that “Deep” Showroom Shine
Once those 60 days are up, you want that “wet look.” You know the one—where the paint on a black Cadillac Escalade looks like a pool of dark ink.
The secret isn’t a magic spray; it’s a “breathable” glaze. Before the 60-day mark, if you absolutely must have some shine for a car meet, pros use a product called a “Show Car Glaze” (like Meguiar’s #7). It doesn’t have wax or silicone, so it won’t seal the paint, but it fills in tiny imperfections and makes the color look incredibly rich.
- The “Glaze” Method: Apply it by hand with a foam pad. It’s oily and a bit of a workout to buff off, but the result is pure glass.
- The Final Seal: After 60 days, I move to a high-quality Carnauba wax like Collinite 845 or Chemical Guys Butter Wet Wax. These provide that warm, American-muscle glow that synthetic coatings sometimes lack.
Why Long-Term Care Prevents “The Peel”
Have you ever seen a five-year-old car where the clear coat is flaking off like a bad sunburn? That usually starts with a poorly handled repair.
As a tech blogger, I look at the “data” of car ownership. Cars that are washed incorrectly in the first year after a repair are 40% more likely to have paint failure within three years. When you follow my steps for how to clean a car after body repair, you aren’t just making it look good for today; you’re preventing the clear coat from delaminating down the road.
- UV Protection: Once the paint is cured, keeping it waxed is like putting SPF 50 on your car.
- Chemical Barriers: Modern US road salts and “brine” are incredibly corrosive. A good wax layer keeps them from reaching the metal.
Final Professional Tip: I’ve shared a lot of my personal “garage secrets” here, but sometimes a job is too big for a Saturday morning. If you’re looking at your car and seeing things that don’t look right—like hazy patches or rough spots—it might be time for a professional “paint correction.” At AutoToolRadar, we have a curated list of the top-rated detailers in every major US city who specialize in fixing post-repair mistakes. I own the site because I believe every car owner deserves a perfect finish. Head over to AutoToolRadar to find the experts who can take your car from “repaired” to “show-stopping.”
Wrapping Up: The Heart of the Car Enthusiast
At the end of the day, your car is more than just a way to get to work. Whether it’s your daily commuter or your weekend toy, it’s an extension of who you are.
Taking the time to learn how to clean a car after body repair shows that you respect the craftsmanship that went into the fix. It’s about taking pride in your ride. I’ve spent countless hours in my driveway with a hose and a bucket, and there’s a meditation in it that you just can’t get anywhere else.
- Be Patient: Don’t rush the cure time.
- Be Gentle: Your hands are the most sensitive tools you own.
- Be Proud: When you pull out into the sun and that new paint shines back at you, you’ll know it was worth every minute.
Stay shiny, my friends. I’ll see you in the next post where we’ll dive into the best 2026 tech for DIY oil changes!

I’m William James, the founder and owner of Auto Tool Radar. My journey didn’t start in a boardroom; it started in my father’s garage in Bellingham, Washington, where I spent my childhood figuring out not just how to fix engines, but why they failed in the first place.
With a Master’s in Automotive Engineering and years of experience as a diagnostic engineer, I saw firsthand how much the industry struggled with outdated tools and guesswork. I founded Auto Tool Radar in 2015 to change that. My philosophy is simple: technology should empower technicians, not complicate their lives. Whether we’re handling precision brake repairs or implementing AI-driven diagnostics, my goal is to provide the reliability and data-driven insights that modern drivers and professionals deserve.