
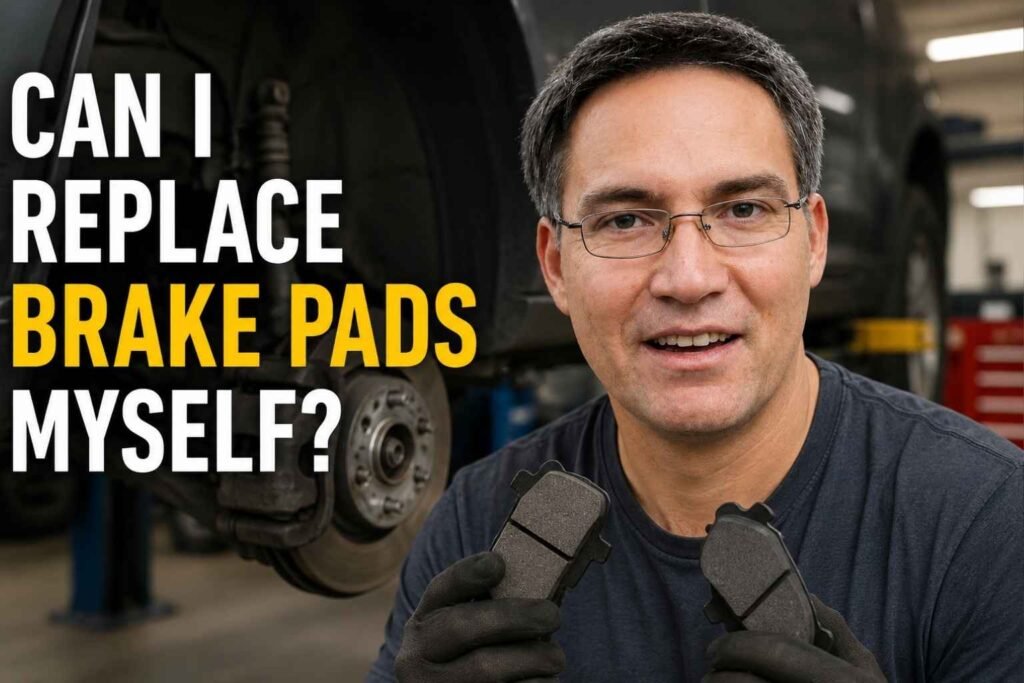
Do those squeaky brakes make you cringe every time you stop? I felt the same way until I asked, “can i replace brake pads myself” to save some hard-earned cash. Since I fixed my first car in my own driveway, I know you can do it too with the right tools. My guide shows you the easy steps to get the job done right and stay safe. Read on to master this skill and see how much to replace brake pads and rotors to compare your savings!
Why I Decided to Skip the Pro Shop
Sometimes you just want to know how things work. I spend all day looking at screens, so I needed to feel some real grease.
The cost was the main spark. In the US, labor rates are hitting the roof. I saw my bill and nearly fell over. I figured I could buy the tools and the pads for half the price of one shop visit.
Plus, there is the pride factor. Telling your friends you fixed your own rig feels great. It makes you feel like a real expert of the road.
- Savings: I saved enough for a nice steak dinner.
- Knowledge: I now know exactly how my car stops.
- Control: I picked the best pads, not the ones the shop had on sale.
- Tools: I now own a torque wrench for future jobs.
The Gear You Need to Get the Job Done
You cannot just use a kitchen knife and a hammer. You need the right kit to stay safe and keep the car happy.
I went to the local hardware store. I felt like a kid in a candy shop. I bought a heavy floor jack because those trunk jacks are scary. They feel like they might tip if a breeze hits them.
- Floor Jack: Get a big one. It lifts the car fast and stays steady.
- Jack Stands: Never put your hands near the car without these. They are your life insurance.
- C-Clamp: You need this to push the brake piston back in.
- Socket Set: Most US cars use metric sizes now, like 14mm or 17mm.
- Brake Cleaner: This stuff smells strong but cleans like a dream.
Pre-Game: Setting Up Your Workspace
Don’t just start pulling bolts. You need a plan so you don’t end up stuck with a car that can’t move.
I picked a dry spot in my garage. I made sure I had plenty of light. It’s hard to see dark bolts in a dark wheel well. I also grabbed a pair of gloves because brake dust is messy.
- Level Ground: Park on flat concrete. Never do brakes on a hill.
- Safety Gear: Wear eye protection. Rust flakes like to jump into eyes.
- Manual: Keep your phone handy to look up torque specs.
- Snacks: You might be out there a while. Grab a water and a granola bar.
Breaking the Seal: Taking the Wheel Off
This is the part where things get real. Once that wheel is off, there is no turning back.
I loosened the nuts before I lifted the car. If you lift it first, the wheel just spins. It’s a silly mistake I’ve made before. I felt the grit of the road on the lug nuts as they turned.
Lifting the Beast
I found the jack point on my frame. I heard the metal groan a little as it went up. I slid the jack stands under the solid frame rails. I let the car down slowly until it sat firm.
Removing the Lug Nuts
I spun them off by hand. I put them in a small magnetic tray. Losing a nut is a nightmare. You don’t want to be hunting in the grass for a tiny piece of metal.
Meeting the Caliper: The Heart of the Brake
The caliper is the part that does the heavy lifting. It’s a big chunk of metal that holds the pads.
I looked at mine. It was covered in gray dust. It looked tired. I took a deep breath. This was the moment I had to be careful.
- The Bolts: Usually, there are two on the back.
- The Hose: This carries the fluid. Do not kink it or let it stretch.
- The Weight: These things are heavy. Have a wire tie ready to hang it.
Removing the Old Pads
This was the most satisfying part of the day. Sliding the old, thin pads out felt like a victory.
I used a flat-head screwdriver to pop them loose. They were thin as a nickel. It was definitely time for a change. I could see the heat marks on the metal clips.
Inspecting the Rotors
I ran my finger over the big metal disc. It felt smooth. If it felt like a record with deep grooves, I would have been in trouble. Luckily, mine were still in good shape for another round.
Cleaning the Hardware
I sprayed everything with brake cleaner. The black dust turned into a liquid and ran off. It was like magic. I wiped down the metal clips until they shone like new.
Installing the New Pads
Now for the new stuff. These pads felt thick and sturdy. They had that “new car” smell.
I put a tiny bit of grease on the back of the pads. This stops them from squeaking. Do not get grease on the front! That would be a very bad day.
- Slide them in: They should fit snug but not tight.
- Check the clips: Make sure they click into place properly.
- Watch the ears: The little metal tabs need to line up perfectly.
Putting It All Back Together
The sun was starting to set. I had to move a bit faster. I felt the cool evening air on my neck.
I slid the caliper back over the new pads. It was a tight fit. I had to use my C-clamp to push the piston in just a bit more. Once it clicked, I felt a huge wave of relief.
Tightening the Bolts
I used my torque wrench. I wanted to be sure. I didn’t want a bolt falling out on the highway. I heard the “click” and knew it was safe.
Mounting the Wheel
I lifted the heavy tire back onto the studs. My back felt it, but I didn’t mind. I tightened the nuts in a star pattern. This makes sure the wheel sits flat.
The First Test Drive
I didn’t just zoom off. I sat in the seat and pumped the pedal. The first few times, it went to the floor. That was scary!
But then, it got firm. I backed out of the driveway slowly. I tapped the brakes. The car stopped. I did it. I really did it.
- Slowest Speed: Start at 5 mph in your driveway.
- Listen Closely: Keep the radio off. Listen for any weird rubs.
- The Bedding Process: Follow the manual to break them in right.
When You Might Need a Real Pro
I love DIY. But I also know when a job is too big. If your car is brand new or has fancy sensors, be careful.
Sometimes things go wrong. A bolt snaps. A line leaks. Or maybe you just don’t have the time. It is okay to ask for help. It is better to be safe than sorry.
If you are in the Bellingham, WA area, I have a recommendation. I actually own a shop called AutoToolRadar. We live for this stuff.
- Expert Care: We know every brand from Ford to Tesla.
- Right Tools: We have the pro gear that fits every nut perfectly.
- Peace of Mind: You get a warranty and a safe ride home.
If you get stuck or just want a pro to do the heavy lifting, give us a shout. You can reach us at +1 564-233-9039. We are right here in Bellingham, WA. We love talking shop and helping neighbors stay safe on the road.
The Secret World of Brake Fluid
Most people forget the juice that makes the whole thing work. I used to be one of those people until I saw how dark my fluid had turned.
Brake fluid is not like oil. It loves to soak up water from the air. In a place like Bellingham, where it rains a lot, this is a big deal. Water in your lines makes the pedal feel like a wet sponge. It can even cause rust inside your expensive parts.
I opened my hood and looked at the little plastic tank. It should be a light honey color. Mine looked more like old coffee. That was a sign that a simple pad swap might need a bit more love.
Why the Color Matters
- Clear/Yellow: You are in the green. Everything is fresh.
- Dark Brown: Time to flush the system. It’s dirty.
- Black: Stop. You need a full service before something breaks.
The “Don’t Touch” Rule
One quick tip from my own mess: do not get this fluid on your car’s paint. It eats paint for breakfast. I once dripped a tiny bit on my fender. By the time I wiped it off, the shine was gone. If you spill, use lots of water and soap fast.
Different Pads for Different US Drivers
Living in the USA means we drive in all sorts of ways. My cousin in Phoenix drives on flat, hot desert roads. My friend in Colorado climbs mountains every day. They should not use the same brake pads.
I had to choose what was best for my own driving style. I mostly do city driving with a few trips to the mountains for hiking. I wanted something quiet but strong.
Ceramic: The Silent Winner
Most new cars in the US come with ceramic pads. They are great because they don’t make your wheels turn black with dust. They also don’t squeal when you pull up to a stoplight. I chose these because I hate cleaning my rims every Saturday.
Semi-Metallic: The Heavy Hitter
If you drive a big Ford F-150 or a Chevy Silverado and you tow a boat, get these. They handle heat much better. They feel “bitey” and strong. The downside? They are noisy and can be dusty. But when you are pulling a heavy load, you want that grip.
Dealing with the “Click” and the “Thump”
After I finished my first side, I heard a weird noise. It was a tiny “click” every time I touched the pedal. I panicked. I thought the wheel was falling off!
I took it all back apart. It turns out, I forgot a tiny metal clip. These clips are called shims. They are there to stop vibrations. Without them, the pad bounces around in the metal bracket.
How to Stay Quiet
- Use the Lube: Put a thin layer of brake grease on the metal contact points.
- Check the Clips: Make sure the metal shims are seated flat.
- Tighten Down: A loose bolt is a noisy bolt.
The Sensory Check
Use your ears. If you hear a grinding sound, stop immediately. That means something is touching the rotor that shouldn’t be. If you hear a high-pitched squeak, it might just be a “wear indicator” telling you the pads are seated.
Safety First: The “One Side at a Time” Rule
This is the best advice I ever got. I only work on one wheel at a time. Why? Because if I forget where a spring goes, I can look at the other side.
It’s like having a 3D map right in front of you. I would walk to the left side of the car to see how the clip was pointed. Then I would walk back to the right side and fix it. It saved me a lot of stress.
- Take Photos: Use your phone to snap a picture before you pull it apart.
- Keep it Clean: Don’t mix up the parts from the left and right sides.
- Be Patient: If a bolt won’t move, don’t force it. Use a bit of spray oil and wait.
When the DIY Dream Becomes a Headache
I’ll be honest with you. Not every DIY job goes perfectly. Last year, I tried to do the rear brakes on a newer Honda.
I didn’t realize it had an electric parking brake. You can’t just push those pistons back with a C-clamp. You need a computer to tell the car to “retract” the brakes. I almost broke a $400 motor because I didn’t check the manual first.
Common US Car Hurdles
- Electronic Parking Brakes: Very common on newer Ford, GM, and European imports.
- Rust Belt Woes: If you live where they salt the roads, bolts will be stuck.
- ABS Sensors: These tiny wires are easy to snap. If you break one, your dash will light up like a Christmas tree.
My Personal Pro-Tip for Bellingham Folks
If you are doing this at home and you feel that “uh-oh” moment, don’t sweat it. It happens to the best of us. I have spent many nights with a flashlight in my mouth, wondering why a bolt won’t fit.
That is exactly why I started AutoToolRadar. I wanted a place where people could get expert help without the corporate “big shop” feel. We treat your car like it’s our own.
If your “quick Saturday job” turns into a “Sunday nightmare,” just give us a call. We can help you finish the job or do a full safety check to make sure your DIY work is solid.
You can find us in Bellingham, WA. Our shop line is +1 564-233-9039.
Whether you drive a lifted Jeep or a commuter Tesla, we’ve got the tech and the tools to handle it. Sometimes, the most “expert” thing you can do is know when to hand over the wrench.
The Hidden Cost of the “Pad Slap”
I used to think I was clever. I would just swap the pads and leave the old rotors alone. In the car world, we call this a “pad slap.” It sounds fast and easy. But my car started shaking like a leaf every time I hit the brakes.
The rotors look flat, but they can warp from heat. Think of it like a piece of wood that bends in the sun. If your rotor is not perfectly flat, your new pads won’t grip right. You will feel a pulsing in your foot. It feels like the car is shivering.
I learned my lesson after a trip down a steep hill near Mount Baker. My steering wheel started vibrating so hard my hands went numb. Now, I always check the rotors. Sometimes you can resurface them, but usually, it is safer to just buy new ones.
Should You Buy New Rotors?
- The Lip Test: Run a finger (when cool!) near the edge. A big ridge means they are worn out.
- The Sight Test: Look for blue spots. That means the metal got way too hot.
- The Shake Test: If the pedal pulses now, new pads won’t fix it. You need new discs.
My Favorite Part: The “Click” of the Torque Wrench
There is a specific sound that makes me feel like a pro. It is the click of a torque wrench. When I first started, I just tightened bolts until I was red in the face. That is a huge mistake.
If you over-tighten a bolt on a Chevy or a Dodge, you might stretch the metal. It could snap while you are driving. If you leave it too loose, it might vibrate out. Neither of those is a good time.
I spent eighty dollars on a nice digital torque wrench. It was the best money I ever spent. I looked up the “spec” for my car. For my wheels, it was 80 foot-pounds. Hearing that click gave me the peace of mind to drive my family to the park.
Why USA Drivers Need Accuracy
- Highway Speeds: We drive fast on the freeways. You need everything to stay tight at 70 mph.
- Weather Changes: In Washington, the temp swings from freezing to hot. Metal expands and shrinks. Correct torque keeps things stable.
- Alloy Wheels: Most US cars have fancy rims. If you don’t torque them right, you can actually crack the wheel.
Dealing with the Mess: Brake Dust is No Joke
Let’s talk about the grit. After my first DIY job, I looked like I had been working in a coal mine. Brake dust is a mix of carbon, metal, and old friction material. It gets everywhere.
I made the mistake of wiping my forehead with my glove. I had a black streak across my face for two days! Now, I keep a box of black nitrile gloves by my toolbox. They make me look like those cool car guys on YouTube, and they keep my hands clean.
- Pro Tip: Don’t blow the dust with an air hose. You don’t want to breathe that stuff in.
- The Bucket Method: Use a wet rag or brake cleaner to wash the dust into a pan.
- Protect Your Driveway: Put down a piece of cardboard. Brake cleaner can leave a permanent white mark on your nice concrete.
The “Oops” Moments: Learning from My Fails
I want to be honest with you. I am a tech blogger, not a robot. I have made mistakes. Once, I put a pad in backward. Yes, I really did that. I was talking to a friend and stopped paying attention.
The metal back of the pad was touching the rotor. As soon as I pulled out of the driveway, I heard a sound like a saw cutting through a pipe. I felt so silly! But that is how you learn. I pulled back in, flipped it around, and fixed it.
- Lesson 1: Don’t work when you are tired.
- Lesson 2: Lay your parts out in a line. It helps you see if something is missing.
- Lesson 3: Double-check every bolt twice. I call it the “Final Walkthrough.”
When to Call the Experts at AutoToolRadar
Doing your own brakes is a great skill. It makes you feel like the king of your garage. But sometimes, the job gets messy. Maybe a bolt snaps off. Or maybe you just can’t get that pesky clip to stay in place.
I know that feeling of looking at your car and wishing you hadn’t started. Don’t feel bad. Even the pros have “bad car days.” That is why I opened my shop right here in Bellingham.
We don’t just fix cars; we solve problems. If you are halfway through a job and realize you are in over your head, don’t worry. We can take it from there. We have the heavy-duty lifts and the pro-grade scanners to handle any American or Import vehicle.
- Location: 4030 cordata parkway, Bellingham, WA.
- Phone: +1 564-233-9039.
- Owner: That’s me! I’ll make sure your ride is safe.
Give AutoToolRadar a ring. We can talk about your car, the parts you chose, and how to get you back on the road. Safety is the most important thing. If you aren’t 100% sure, let us give it a look.
The Joy of the Test Drive
Once the last bolt is tight, the best part starts. I love the feeling of backing out of the garage. My hands are still a bit greasy. My back is a little sore. But the car feels different. It feels like mine.
I always start by rolling very slowly. I tap the pedal lightly. I want to feel that “bite.” If the pedal feels firm, I head down my street. I keep the windows down. I want to hear everything. I listen for any odd clicks or rubs.
The “Bedding In” Secret
You cannot just go racing down the road yet. New pads and old rotors need to get to know each other. I call it the “first date” for your brakes. You have to be gentle.
- The 30-30-30 Rule: Drive 30 miles per hour. Stop slowly 30 times. Wait 30 seconds between stops.
- Avoid Slamming: Do not slam on the brakes for the first day. You don’t want to “glaze” the pads.
- The Smell: You might smell something a bit “toasty.” That is normal. It is just the new coating wearing off.
Modern Cars and the Software Struggle
I love tech. I write about it every day. But sometimes tech makes car repair hard. Many new cars in the USA now have computers for everything. My neighbor has a new electric car. He tried to do his brakes and got stuck.
The car has a “service mode.” You have to find a menu on the big screen. If you don’t click it, the car will try to squeeze the brakes while your fingers are in there! That is a very scary thought. Always check your screen before you grab your wrench.
- Check the App: Some cars have a “Tow Mode” or “Service Mode” in their app.
- Battery Safety: If you have an EV, be careful where you place your jack. You don’t want to hit the battery tray.
- Sensors: Watch out for the thin wires. Those tell the car when the pads are low. If you snap one, your dash will beep at you forever.
Why I Keep Doing It Myself
People ask me why I bother. I have a shop. I have a busy blog. Why get dirty on a Saturday? For me, it is about the “why.” When I fix my own brakes, I trust my car more. I know exactly what is inside those wheels.
In the USA, we spend a lot of time in our cars. We commute. We take road trips to the coast. We drive our kids to school. Having good brakes is the most important safety feature you have. It is more important than a fancy radio or heated seats.
The Sense of Pride
- Saving Cash: I can spend that money on new tech gadgets instead.
- Problem Solving: It keeps my brain sharp. It is like a puzzle made of steel.
- The Story: Every scar on my knuckles has a story. Like the time I dropped a bolt in my coffee!
A Note on Quality: Don’t Buy the Cheapest Parts
I once bought the cheapest pads I could find online. They were twenty dollars. They looked fine. But after a week, my wheels were covered in black soot. Every time I stopped, it sounded like a dying bird was under my car.
In the USA, we have a lot of choices. You will see “Value” pads and “Premium” pads. Spend the extra ten bucks. Get the good ones. Your rotors will last longer. Your car will be quieter. And you won’t have to do the job again in six months.
- Trust the Brands: Look for names like Bosch, Akebono, or Brembo.
- Read Reviews: Other car owners will tell you if a pad is noisy.
- Check the Box: Make sure it comes with new clips and grease.
Let’s Be Real: When Life Gets in the Way
Sometimes you start a job and life happens. Maybe it starts to pour rain. Maybe your kid has a soccer game. Or maybe that one bolt is just rusted solid. I have been there. I have sat on my garage floor feeling totally defeated.
There is no shame in calling for backup. That is why I built a team of experts. We are car lovers just like you. We don’t judge a half-finished job. We just want to help you get it across the finish line.
If you are near Bellingham, WA, come see us. We can take a look at your work. We can finish the tricky stuff. Or we can just do the whole job while you grab a coffee next door.
AutoToolRadar is your local partner for all things automotive. Find us in Bellingham. Give us a ring at +1 564-233-9039.
I am the owner, and I promise we will treat you right. We know the roads here. We know the weather. And we know how much you love your car. Let’s make sure it stops exactly when you need it to.
The Rust Battle: Living in the Pacific Northwest
If you live in Bellingham, you know about the rain. We get a lot of it. For your car, that means rust is the enemy. Water loves to hide behind your wheels. It turns shiny metal into orange flakes.
When I took my pads off last month, I saw a lot of “gunk.” It was a mix of road salt and old mud. This stuff can make your brakes stick. If they stick, they get hot. If they get hot, they wear out fast. I spent ten minutes just scrubbing the metal with a stiff brush.
My Clean-Up Routine
- The Wire Brush: Use it to knock off the big chunks of rust.
- The “Magic” Spray: Use plenty of brake cleaner to wash away the grit.
- Check the Lines: Look at the rubber hoses. If they look cracked like old skin, replace them.
- Focus on the Hub: Make sure the flat part where the rotor sits is clean. A tiny pebble here can make the whole car shake.
Tools of the Trade: The Brake Spreader
I used to use a big C-clamp to push the piston back. It worked, but it was clunky. It felt like I was using a sledgehammer to hang a picture. Then I bought a real brake spreader tool.
It is a small gadget that fits right inside the caliper. You turn a handle, and it pushes the piston back smooth and even. It felt so much better! It didn’t slip, and I didn’t worry about scratching the metal.
Why Use the Right Tool?
- Even Pressure: It pushes the piston straight back. This protects the seals.
- Speed: It takes five seconds instead of five minutes.
- Safety: It won’t pop off and hit you in the shins. I’ve been there, and it hurts!
- Dual Pistons: If you have a big Ford or RAM truck, you might have two pistons. A spreader handles both at once.
The True Cost: DIY vs. The Shop in 2026
Let’s talk about the math. I’m a tech guy, so I love numbers. In 2026, the price to fix brakes at a shop has gone up. Parts are more expensive. Labor is way higher.
If you take your car to a pro, you might pay $300 or even $400 for just the front wheels. If you need rotors too, that bill can hit $700 fast. By doing it yourself, you can get high-quality ceramic pads for under $80. You save enough to pay for a whole year of Netflix!
Where Your Money Goes
| Item | DIY Cost | Shop Cost |
| Brake Pads | $50 – $90 | $150+ (with markup) |
| Labor | $0 (and a beer) | $150 – $250 |
| Shop Fees | $0 | $30 – $50 |
| Total | ~$70 | ~$400 |
The Final Check: Is it Worth the Risk?
I always ask myself this before I start. For most cars, the answer is yes. It is a simple job. But if you feel shaky, don’t force it. Your life is worth more than a few hundred bucks.
If you get the wheel off and feel overwhelmed, take a breath. It’s okay to put the tire back on and drive to a pro. I’ve seen people try to “wing it” and end up with no brakes at a red light. That is a nightmare no one wants.
When to Wave the White Flag
- Fluid Leaks: If you see a puddle of oily fluid, stop. You have a leak.
- Broken Bolts: If a bolt snaps, you need a pro with a torch.
- Strange Lights: If your ABS light stays on, the car’s computer is unhappy.
Come Visit Me at AutoToolRadar
I love the DIY spirit. I really do. But I also know that some days you just want the job done right while you relax. That is why I opened AutoToolRadar.
We have all the fancy 2026 tech tools. We have the scanners that talk to your car’s brain. And we have the experience to spot problems before they become dangerous. Whether you are in a Chevy, a Toyota, or a Tesla, we know how to make it stop on a dime.
If you are in Bellingham, WA, stop by and say hi.
You can call us at +1 564-233-9039.
I’ll give your brakes a look and make sure you’re ready for the road. No stress. No hidden fees. Just honest work from one car lover to another.

I’m William James, the founder and owner of Auto Tool Radar. My journey didn’t start in a boardroom; it started in my father’s garage in Bellingham, Washington, where I spent my childhood figuring out not just how to fix engines, but why they failed in the first place.
With a Master’s in Automotive Engineering and years of experience as a diagnostic engineer, I saw firsthand how much the industry struggled with outdated tools and guesswork. I founded Auto Tool Radar in 2015 to change that. My philosophy is simple: technology should empower technicians, not complicate their lives. Whether we’re handling precision brake repairs or implementing AI-driven diagnostics, my goal is to provide the reliability and data-driven insights that modern drivers and professionals deserve.