
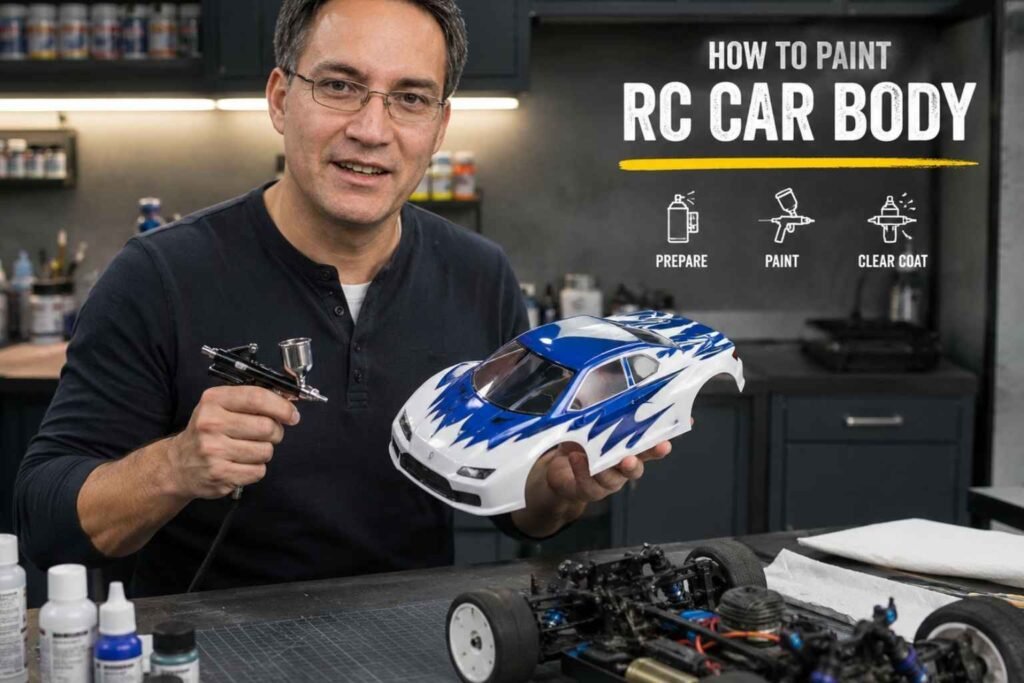
There is nothing like the thrill of seeing your RC car hit the dirt with a fresh look. I once ruined a clear shell because I rushed the prep, but that mistake taught me exactly how to paint an rc car body the right way. My years at the workbench have shown me that a great finish is all about the thin layers. I will walk you through the best steps to get a pro look that lasts. Read on to start your build, and if you want to see how the big cars do it, check out how to repair auto body damage for more tips.
Why I Started Painting My Own Shells
Most of us start with the “Ready-To-Run” models. They look great out of the box, but they lack that personal touch that makes the hobby special.
I decided to paint my first shell because I wanted a color that matched my real-life Jeep. I wanted that specific “Sting-Gray” look. It turns out, finding that exact vibe in a pre-painted RC body is almost impossible.
- Personal Expression: You can choose colors that aren’t available in stores.
- Cost Savings: Buying a clear body and painting it is often cheaper than buying a pre-painted replacement.
- Pride of Ownership: There is a specific joy in seeing your handiwork flying over a jump at 40 miles per hour.
I’ll admit, my first attempt was a disaster. I used the wrong paint, and it flaked off like a bad sunburn. But that’s how we learn, right? Now, I can get a finish that looks like it came from a professional shop.
Setting Up Your Workspace for Success
You don’t need a professional paint booth to get a great result. I usually just clear off my old wooden workbench and put down some newspaper.
The key is a clean, dust-free zone. If you have a cat like mine, keep them out of the room. One stray hair under the paint will haunt you forever.
- Ventilation is Key: These paints have a very strong smell. I always crack the garage door open or use a small fan.
- Lighting: You need a good overhead light. It helps you see if the paint is going on evenly or if you have thin spots.
- Temperature Control: Aim for a room that is about 70 degrees. If it’s too cold, the paint won’t flow right.
I once tried to paint a shell in my humid basement during a rainy July day. The paint turned cloudy and “blushed.” It looked like someone had breathed on it. Lesson learned: wait for a dry day.
The Gear You’ll Need
Before you start, make sure you have your supplies ready. I hate having to stop mid-project to run to the store.
- Polycarbonate Spray Paint: This is non-negotiable. Regular spray paint will crack and peel.
- Dish Soap: Good old Dawn works best to remove oils.
- Masking Tape: Get high-quality painter’s tape or specialized RC masking tape.
- X-Acto Knife: Use a fresh blade for crisp, clean lines.
Preparation: The Step Everyone Skips
Most people want to jump straight to the spraying. That is the biggest mistake you can make. If the surface isn’t ready, the paint won’t stay.
A clear RC body is covered in a “mold release” agent. This is a greasy film left over from the factory. If you don’t wash it off, your paint will literally slide right off the plastic.
- Wash It Twice: Use warm water and dish soap. Scrub every corner with your fingers or a soft sponge.
- Rinse Well: Make sure there are no soap bubbles left behind.
- Drying: I like to let mine air dry. If you use a towel, you might leave lint or static behind.
When I was first learning how to paint an rc car body, I skipped the wash. I thought the body looked clean enough. Three runs later, the paint was falling off in huge chunks. It looked like a peeling sticker.
Scuffing for Extra Grip
Some pros like to scuff the inside of the body with a fine pad. I do this on my “basher” trucks that take a lot of abuse.
- Use a Fine Pad: A gray Scotch-Brite pad is perfect.
- Be Gentle: You aren’t trying to scratch it. You just want to take the shine off so the paint has something to “grab.”
- Avoid the Windows: Don’t scuff the parts you want to keep clear!
If you want the best results for your tools and equipment, I always suggest checking out my shop, AutoToolRadar. We know what works for real-world car fans and hobbyists alike.
Masking Off the Windows and Patterns
This is the part that tests your nerves. Remember, we are painting on the inside of the shell. This means your masking needs to be perfect.
Most bodies come with window masks. These are basically stickers that cover the “glass” areas. Line them up carefully. If there is a gap, you’ll end up with “over-tinted” windows.
- Burnish the Edges: Use your fingernail or a plastic tool to press the edges of the tape down. This prevents paint from bleeding under.
- Complex Curves: If you are doing a two-tone design, use thin tape for the curves. It bends much better than thick tape.
- Check for Gaps: Hold the body up to a light. If you see light through the tape edges, the paint will find its way through.
I spent three hours masking a flame pattern once. My back ached, and my eyes were tired. But when I pulled that tape off later? It was the most satisfying feeling in the world. It’s all about the prep.
Using Liquid Mask
If you have a very complex body with lots of vents, tape can be a nightmare. That’s when I reach for liquid mask.
- Apply Thickly: Use a brush to put on three or four coats.
- Let it Dry: It usually turns from white to clear when it’s ready.
- Cut Your Design: Use your knife to trace the lines and peel away the sections you want to paint first.
The First Coat: Don’t Go Overboard
Now for the fun part. Shake that can like it owes you money! I usually shake it for a full two minutes.
The most important rule in how to paint an rc car body is this: light coats. Your first coat should look like a light mist. You should still be able to see through the body.
- Distance: Keep the can about 8 to 10 inches away.
- Motion: Start spraying off to the side, sweep across the body, and stop after you’ve cleared the other side.
- Thin is Win: If you try to cover it in one go, the paint will run. Runs are almost impossible to fix on the inside.
I remember my first “pro” build. I got impatient and sprayed a thick coat of metallic blue. It pooled in the corners and took three days to dry. It looked terrible. Since then, I do at least four or five very thin coats.
Choosing the Right Colors for Your Build
This is where your personal style really comes out to play. In the US, we love our bold colors, like the bright “Electric Orange” on a sports car or a deep “Midnight Black.”
Selecting a color isn’t just about what looks cool in the store. You have to think about how the light hits the plastic once you are out at the park. Some colors look great in your hand but disappear against the grass or dirt.
- Solid Colors: These are the easiest for beginners. They cover well and give a clean, classic look.
- Metallic and Pearls: These have tiny flakes that shimmer in the sun. They look amazing on a scale model of a Ford Mustang or a Chevy Camaro.
- Fluorescent Colors: These are super bright. They are perfect for racing because they make your car very easy to see from a distance.
I once chose a dark forest green for a truck body. It looked beautiful on my desk. But the second I drove it into the shade of some trees, I lost track of it! Now, I always try to add a bright “pop” color somewhere on the roof or wing.
The Order of Painting: Dark to Light
This is a rule you cannot break. Because we are painting the inside of the shell, the first color you spray is the one that will show up on top.
If you spray white first and then put black behind it, the white will look a bit gray and dull. If you spray black first, it stays deep and rich.
- Black and Dark Grays: Start here for your trim or main dark sections.
- Primary Colors: This is your reds, blues, or greens.
- Bright Highlights: This is for your yellows or neons.
- Backing Colors: This is the final layer that seals everything in.
I remember helping a friend who wanted a white car with black racing stripes. He sprayed the white first. When he sprayed the black stripes over it, the whole car turned a weird, cloudy gray. He had to start all over with a new shell.
Backing Your Paint for That Professional Look
Backing is a step many people forget. It’s like the secret ingredient in a good BBQ sauce. It makes everything better.
When you finish your main color, the paint is still a bit translucent. If you hold it up to a light, you can see through it. Backing the paint with a final layer makes the color solid and protects it from scratches.
- Backing with Silver: This is best for metallic colors. It makes the metallic flakes really “pop” and shine.
- Backing with White: This makes bright colors like yellow or orange look much more vivid.
- Backing with Black: Use this for dark colors to give them a deep, heavy look.
I always use a final “sealant” coat of black or silver over the entire inside. It protects the paint from the battery and wires rubbing against it. If you need the right tools to keep your RC gear or real-world tools in top shape, check out my site, AutoToolRadar. We have the gear that pros actually use.
Dealing with Paint Fumes and Safety
I know it’s tempting to just spray in the middle of your living room, but don’t do it. RC paint is very strong and can make you feel lightheaded pretty quickly.
Safety might sound boring, but it’s important so you can keep enjoying the hobby. Plus, you don’t want to get paint overspray on your nice furniture or the floor!
- Wear a Mask: A simple dust mask is okay, but a respirator is better if you do this a lot.
- Use a Box: I like to put my car body inside a large cardboard box. It catches the extra mist.
- Gloves: I wear disposable gloves. It keeps the paint off my hands and keeps my finger oils off the plastic.
One time, I got a bit lazy and didn’t wear gloves. I accidentally touched the inside of a freshly washed body. The oil from my thumb left a perfect “ghost” print in the paint that I couldn’t get off. Now, I’m a glove believer!
The Wait: Let the Paint Dry Properly
Patience is the hardest part of learning how to paint an rc car body. When you see that cool color shining through the plastic, you want to put the wheels on and drive.
But if the paint is still “outgassing” or wet, it can smudge. Worse, if you pull the masking tape too early, the paint might peel off with the tape.
- The 15-Minute Rule: Wait at least 15 minutes between light coats.
- The Overnight Cure: I like to let my finished body sit for a full 24 hours before I start peeling the film or adding stickers.
- The Hair Dryer Trick: You can use a hair dryer on a low, cool setting to speed things up. Never use high heat! It can warp the plastic shell.
I’ve had days where I was in a rush to get to the track. I slapped the body on while it was still slightly tacky. By the end of the day, the dirt was stuck into the paint. It looked like a sandpaper finish. Take your time!
The Big Reveal: Peeling the Protective Film
This is the moment every RC enthusiast lives for. If you bought a quality body from a brand like Pro-Line or JConcepts, it comes with a thin, clear film on the outside.
This film is there to catch all the “overspray” that escapes while you are painting the inside. Without it, the outside of your car would look dull and misty.
- Find an Edge: Use your fingernail to catch a corner near the wheel well or the bottom of the door.
- The Slow Pull: Pull the film back slowly. You will hear a crinkling sound that is incredibly satisfying.
- Check the Shine: As the film comes off, the true gloss of the polycarbonate is revealed. It should look like a “wet” showroom finish.
I remember my first build back in the day. I didn’t realize there was a film. I was so upset because my paint job looked “fuzzy” on the outside. I almost threw it away! Then I saw a corner peeling. When I ripped it off, I felt like a genius.
Trimming Your Masterpiece Without Tears
Now that the paint is done, you have to cut the body out of the plastic sheet. This is the part where most people get nervous because one wrong cut can ruin the look.
In the US, we love our “scale” looks. Whether it’s a Short Course Truck or a Rock Crawler, you want those wheel wells to look perfectly round.
- Use Curved Scissors: These are a lifesaver. They allow you to cut around fenders and bumpers with one smooth motion.
- The Score and Snap Method: For straight lines, you can use a sharp hobby knife to lightly score the plastic. Then, just bend it until it snaps cleanly.
- Sand the Edges: I always use a little bit of sandpaper or a sanding drum on a Dremel to smooth out any jagged bits.
I once tried to use regular kitchen scissors to trim a body. It was a nightmare. The plastic cracked, and the edges looked like they had been chewed by a dog. Spend the few dollars on real RC scissors—your hands and your car will thank you.
Reaming Body Post Holes
You have this beautiful paint job. Now you have to poke holes in it to mount it to the chassis. It feels wrong, but it’s necessary.
Whatever you do, do not use a standard power drill. The drill bit will catch the plastic and tear a ragged, ugly hole. It can even crack your fresh paint.
- Use a Body Reamer: This is a T-handle tool with a very sharp, tapered point.
- Go Slow: Twist the reamer slowly and check the size of the hole often.
- Measure Twice: Mark your spots with a sharpie on the outside film before you peel it. This ensures your body sits straight on the truck.
I’ve seen guys at the local track with bodies that sit crooked because they “eyeballed” the holes. It makes the whole car look cheap. If you want the right tools for this kind of precision, stop by AutoToolRadar. I only recommend the stuff I actually use in my own garage.
Applying Decals for That Final Polish
Decals are what take your car from a plain color to a racing machine. Most bodies come with a sheet of stickers featuring lights, grills, and logos.
Applying stickers sounds easy, but bubbles can ruin the look. If you are in a dry climate like Arizona, static can make the stickers jump out of your hand!
- The Windex Trick: Spray a tiny bit of glass cleaner on the body first. This lets you slide the sticker around until it’s perfect.
- Use a Squeegee: Use a soft plastic edge or a credit card to push the liquid and air bubbles out from under the sticker.
- Hair Dryer Finish: Give the stickers a quick hit of low heat. This helps them “set” into the curves of the body.
I like to add a few “scale” touches, like a tiny US flag or a local hobby shop logo. It makes the car feel like it belongs to a real racing team. Just don’t go too crazy—sometimes “less is more” when it comes to a clean design.
Troubleshooting Common Painting Mistakes
Even after years of doing this, I still make mistakes. The difference is knowing how to fix them instead of starting over.
If you find a spot where the paint bled under the tape, don’t panic. There are ways to clean it up if you catch it early.
- Paint Bleed: You can use a tiny amount of “polycarbonate cleaner” or even a wooden toothpick to gently scrape away the unwanted paint.
- Thin Spots: If you see a light area after you’ve finished, you can usually add another coat of backing paint to hide it.
- Dust in the Paint: If a piece of lint gets stuck in a wet coat, leave it! If you try to dig it out, you’ll make a giant smear. Wait for it to dry, lightly sand it, and spray again.
I once dropped an entire can of paint right onto a drying body. It was a mess. But by staying calm and using the right cleaners, I saved the shell. It wasn’t perfect, but from ten feet away on the track, you couldn’t even tell.
Protecting Your Paint from the “Inside Out”
Once you’ve mastered how to paint an rc car body, you want that look to last through more than one bash session. In the US, our tracks can be brutal. Whether it’s the red clay in Georgia or the rocky trails in Colorado, your car takes a beating.
The biggest threat to your new paint job isn’t the sun—it’s the car itself. The battery, the wires, and the plastic chassis rub against the inside of the shell every time you hit a bump.
- Shoe Goo and Drywall Tape: This is the “gold standard” for RC pros. Apply a thin layer of Shoe Goo glue to the high-wear areas.
- Reinforce the Wheel Wells: This is where rocks fly up and pepper your paint. A little extra reinforcement here prevents “star cracks.”
- Body Post Protectors: Use small foam pads on your body posts. This stops the body from rattling and chipping the paint around the holes.
I remember my first “shelf queen” build. I spent forty hours on the paint. I took it out for one run, and the battery strap rubbed a huge hole right through the center of my custom hood design. I nearly cried. Now, I “armor” every body before it ever touches the dirt.
The Impact of Weather on Your Paint Job
We live in a big country with all kinds of weather. What works in the dry heat of Nevada might not work in the humid air of Florida.
Humidity is the number one enemy of a smooth finish. When the air is full of water, the paint can’t dry properly. This leads to “blushing,” which makes your clear coat look like it has white fog trapped inside it.
- The Best Time to Paint: I find that mid-morning is usually best. The dew has dried, but the midday heat hasn’t made the paint dry too fast.
- Indoor Painting: If you must paint inside during the winter, make sure the body and the paint cans are at room temperature.
- Humidity Check: If it’s over 50% humidity, I usually find something else to do. It’s just not worth the risk of a ruined shell.
I once tried to paint a body in my garage during a Texas thunderstorm. The paint came out feeling like sandpaper. It was so humid that the paint partially dried in the air before it even hit the plastic. If you want advice on the best weather-resistant tools, AutoToolRadar has the guides you need to stay prepared.
Advanced Techniques: Fades and Shadows
Once you are comfortable with solid colors, you might want to try a “fade.” This is where one color smoothly blends into another, like a sunset.
Fades look amazing on “SCT” (Short Course Trucks) or drift cars. It gives the illusion of speed even when the car is sitting still on the workbench.
- The Distance Trick: To get a soft fade, pull the spray can further away as you reach the “blend” area.
- Start with the Lightest Color: In a fade, I usually start with the lighter color in the middle and work the darker color in from the edges.
- Shadowing: You can use a tiny bit of black or smoke paint around the door lines or hood scoops to give the body “depth.”
I tried my first fade with neon yellow and deep purple. I didn’t practice on a scrap piece of plastic first. The middle turned into a weird, muddy brown color. Always test your color blends on a clear plastic soda bottle first! It’s a cheap way to see how the colors play together.
Using Masks for Logos and Custom Brand Names
If you want your RC car to look like a real sponsored racer, you’ll want to include some brand names. In the US, names like “Ford,” “Pennzoil,” or “Monster Energy” are iconic on the track.
You can buy pre-cut vinyl masks for these logos. You stick them on the inside, paint your main color, and then peel the mask to reveal the clear plastic in the shape of the logo. Then you back it with a different color.
- Alignment is Everything: Use a ruler. A crooked logo makes the whole car look “off.”
- Avoid “Bleed”: Use a credit card to press down the edges of the logo mask very firmly.
- Negative Space: Remember that you are painting the background around the logo first.
I love putting my own brand on my cars. It makes it feel like I have a factory-backed racing team. It’s a small detail, but when you’re lining up at the start gate, it gives you a bit of extra confidence.
Cleaning Up After a Painting Session
I’ll be honest—I’m not the tidiest person when I’m in the “creative zone.” But cleaning up is part of the process if you want to keep your gear in good shape.
If you leave your spray cans with paint in the nozzle, they will clog. Then, the next time you go to use them, they will “spit” big blobs of paint onto your new project.
- Clear the Nozzle: Hold the can upside down and spray for two seconds until only clear gas comes out.
- Wipe the Cap: Use a paper towel to wipe any wet paint off the nozzle tip.
- Store in a Cool, Dry Place: Keep your cans away from heat sources or direct sunlight in the garage.
I once ruined a $20 can of specialized metallic paint because I didn’t clear the nozzle. When I tried to use it a month later, it was stuck solid. Now, I’m very disciplined about my cleanup. For more tips on maintaining your hobby and professional tools, I always point people toward AutoToolRadar. We keep your shop running smooth.
Taking the Perfect Photo of Your New Body
In the age of social media, the project isn’t truly finished until you’ve posted a photo of it. But taking a photo of a shiny RC body is surprisingly hard.
The plastic is very reflective. If you use a flash, you’ll just get a giant white “hot spot” in the middle of your paint job.
- Natural Light is Best: Take your car outside during the “Golden Hour” (just before sunset).
- Low Angle: Get down on the ground. Photographing the car from a “worm’s eye view” makes it look like a full-sized vehicle.
- Clean the Fingerprints: Use a microfiber cloth to wipe off any oil or dust before you snap the picture.
I love sharing my builds with the RC community online. There’s a great group of people out there who appreciate the hard work that goes into a custom shell. Plus, it’s a great way to document your progress as you get better at how to paint an rc car body.

I’m William James, the founder and owner of Auto Tool Radar. My journey didn’t start in a boardroom; it started in my father’s garage in Bellingham, Washington, where I spent my childhood figuring out not just how to fix engines, but why they failed in the first place.
With a Master’s in Automotive Engineering and years of experience as a diagnostic engineer, I saw firsthand how much the industry struggled with outdated tools and guesswork. I founded Auto Tool Radar in 2015 to change that. My philosophy is simple: technology should empower technicians, not complicate their lives. Whether we’re handling precision brake repairs or implementing AI-driven diagnostics, my goal is to provide the reliability and data-driven insights that modern drivers and professionals deserve.